
In 2024, Unexpected Vertical Tilt in Instagram Vids? Why?
Unexpected Vertical Tilt in Instagram Vids? Why?
Are you worried that your video on Instagram is sideways?
There are a few possible reasons why your Instagram video is sideways. One option is that you uploaded the video with the wrong rotation. Another possibility is that you took the video with your phone’s camera in the wrong orientation. Finally, Instagram may not have been able to detect the proper orientation of the video, causing it to be shown sideways.

Why does Instagram keep flipping my video?
Because Instagram is built to display videos in landscape mode, it may be flipping your videos sideways. This indicates the video will be rotated to be wider than it is tall, which is the standard video orientation.
So, when you post a vertical video to Instagram Stories from your camera roll, it is automatically cropped to a 9:16 aspect ratio. Because your phone camera didn’t automatically alter the orientation before you started filming, films filmed horizontally can sometimes be posted sideways.
## How to rotate videos for Instagram?Individuals currently choose to capture films utilizing high-resolution cameras rather than large video cameras on mobile devices. However, you may overlook the video’s orientation, resulting in a completely reversed recording.
Don’t be alarmed! You can easily restore the video to its original state using various free programs (instead of turning your neck to watch the video). Here are a few basic tools for rotating, flipping, and turning your videos (both software and web-based options).
Many applications and softwares can be used to rotate videoes, but among all of them, Filmora is one of the highly recommended software.

1. Filmora
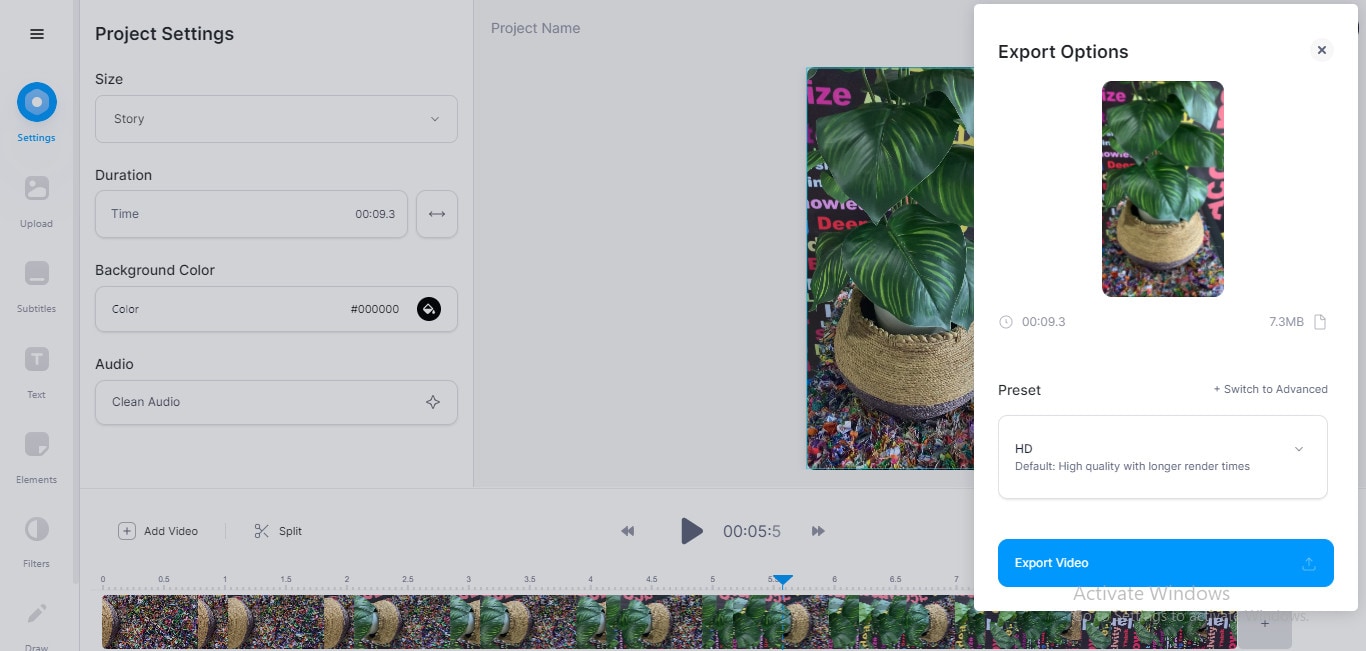
In Filmora, you can rotate your movie to whatever angle you choose. You may also quickly zoom in or crop out the video parts that you don’t want to watch. Predefined aspect ratios such as 16:9, 9:16, 4:5, 1:1, and others are also included to assist you in easily finding the best aspect ratio for YouTube, Instagram, and other sites. But, first, let’s look at how to change a video’s orientation in Filmora.
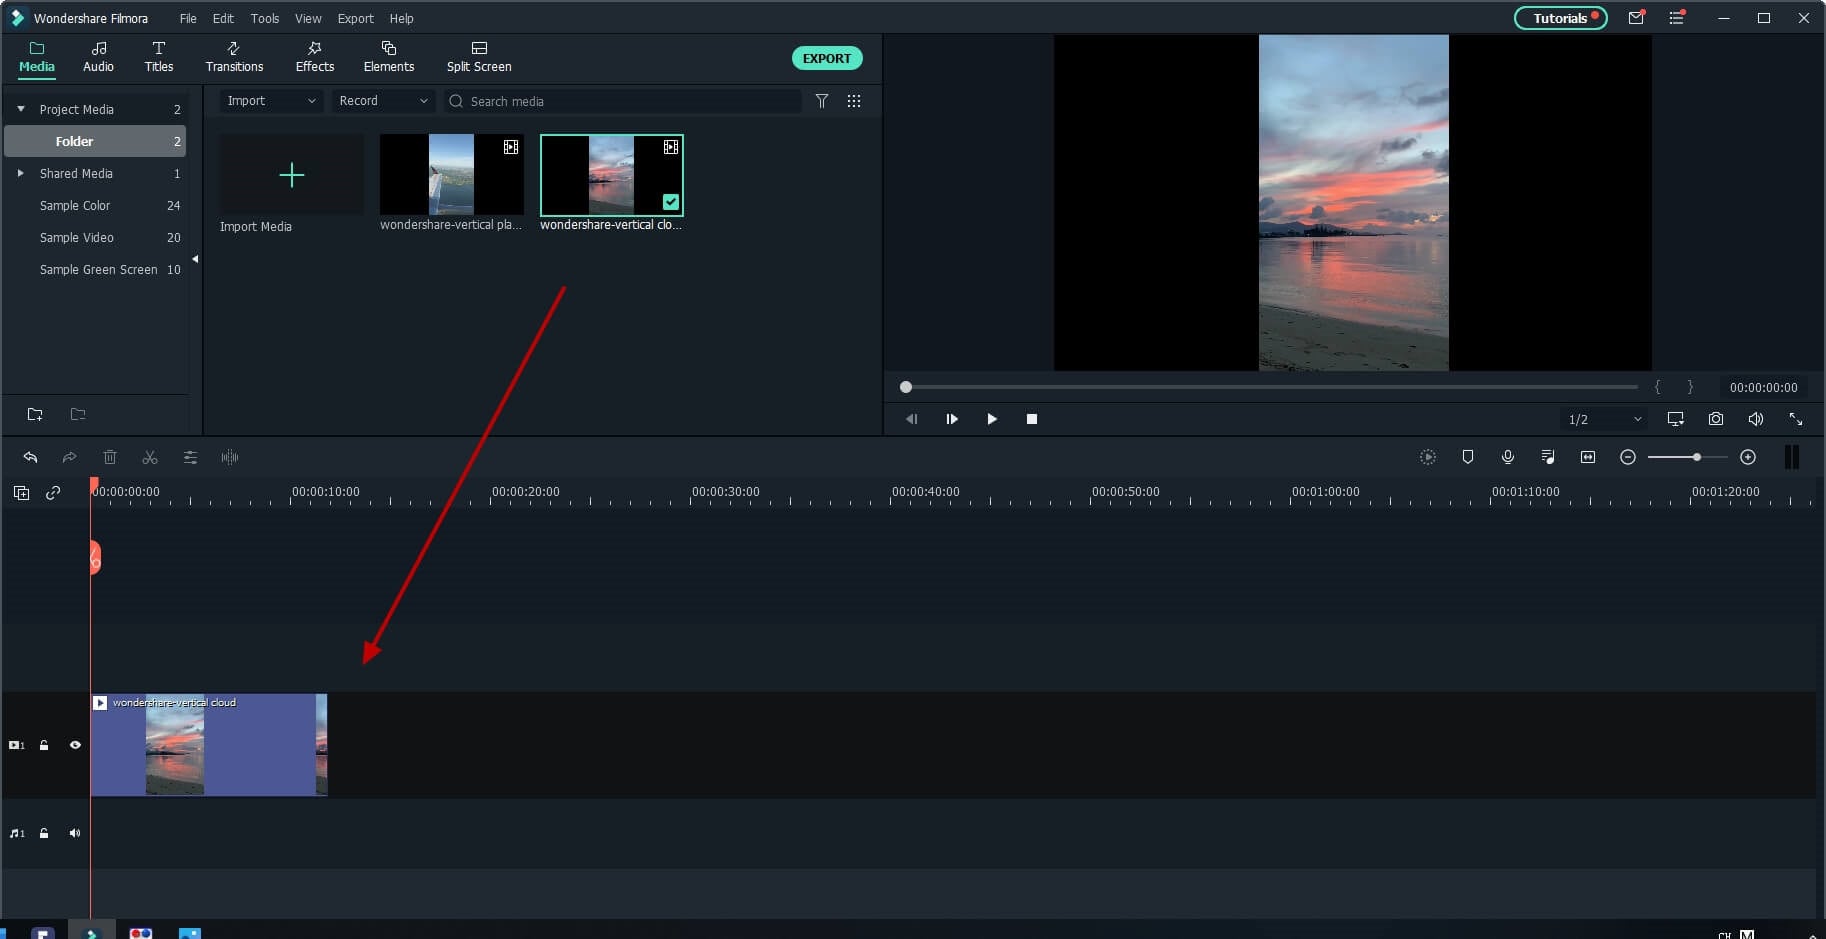
Step 1: Import the video
Launch Filmora and drag the video onto the timeline.
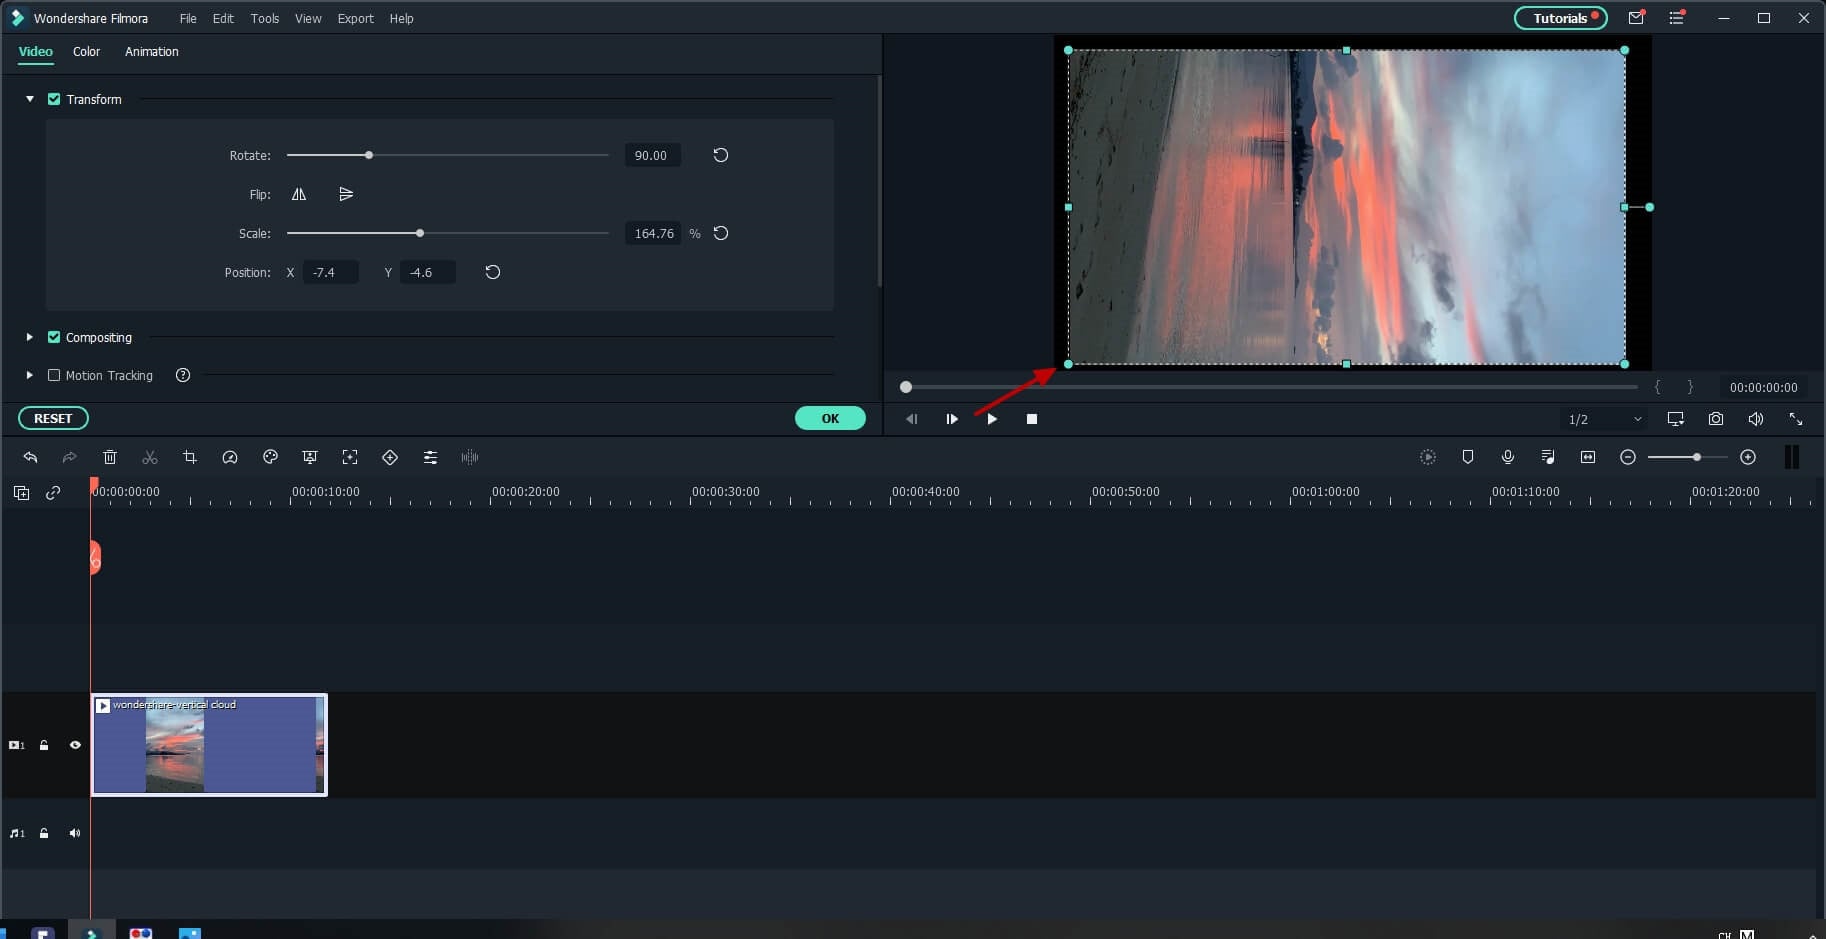
Step 2: Rotate the video
Double-click the video clip on the timeline to open the video editing window. Under the “Transform” menu, look for the “Rotate” option. You can change the rotation value by sliding the slider or entering a certain value. It is possible to rotate up to 360o. For example, if you want to rotate this clip 90 degrees, write “90” in the box, and the video clip will be rotated.

By dragging the “Scale” button, you can make the image a full screen or alter the position, size, shape, and other aspects of the image directly in the Viewer panel.
Step 3: Export the video
When you’re happy, click export. You can alter the format of your work right here, or you can upload it to YouTube.

2. Veed.io
Compatibility: Online
VEED is a web-based video editor that allows you to create and modify videos quickly. It’s free to use, and the instructions for rotating video clips are straightforward. In addition, you can use VEED to add subtitles, music, and GIFs, or merge and combine your videos online and rotate them.
Step 1: Import the video:
Click on ‘browse video’ to choose a video file from your computer to upload.
Whether or not you have a VEED account, you can upload and edit your video. You can also record a new video or use other upload mechanisms like Dropbox or a YouTube URL using VEED.
 PCDJ DEX 3 for Windows & MAC is the total entertainment DJ software solution, offering audio, video, and karaoke mixing ability. Automatic beat-sync, smart looping, 4 decks, DJ MIDI controller support, Karaoke Streaming and much more.
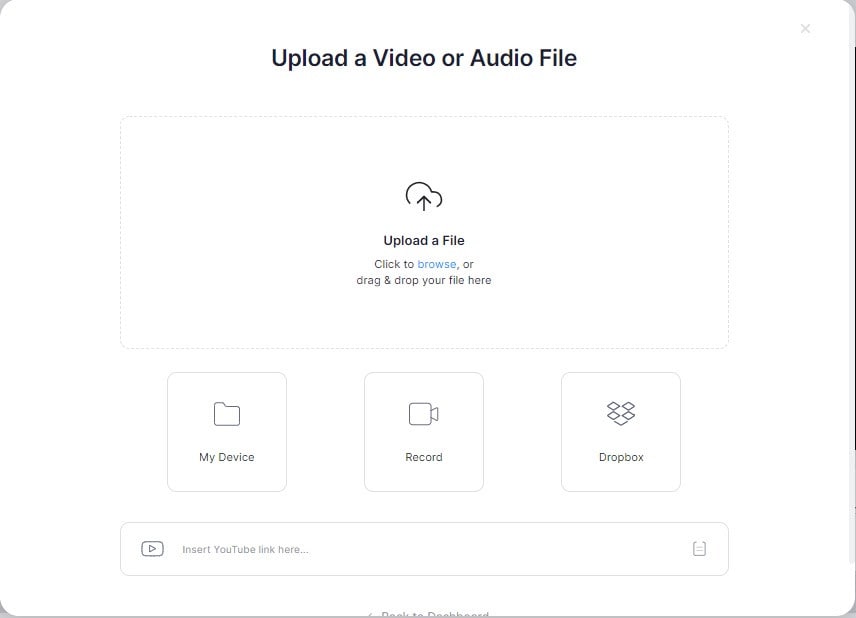
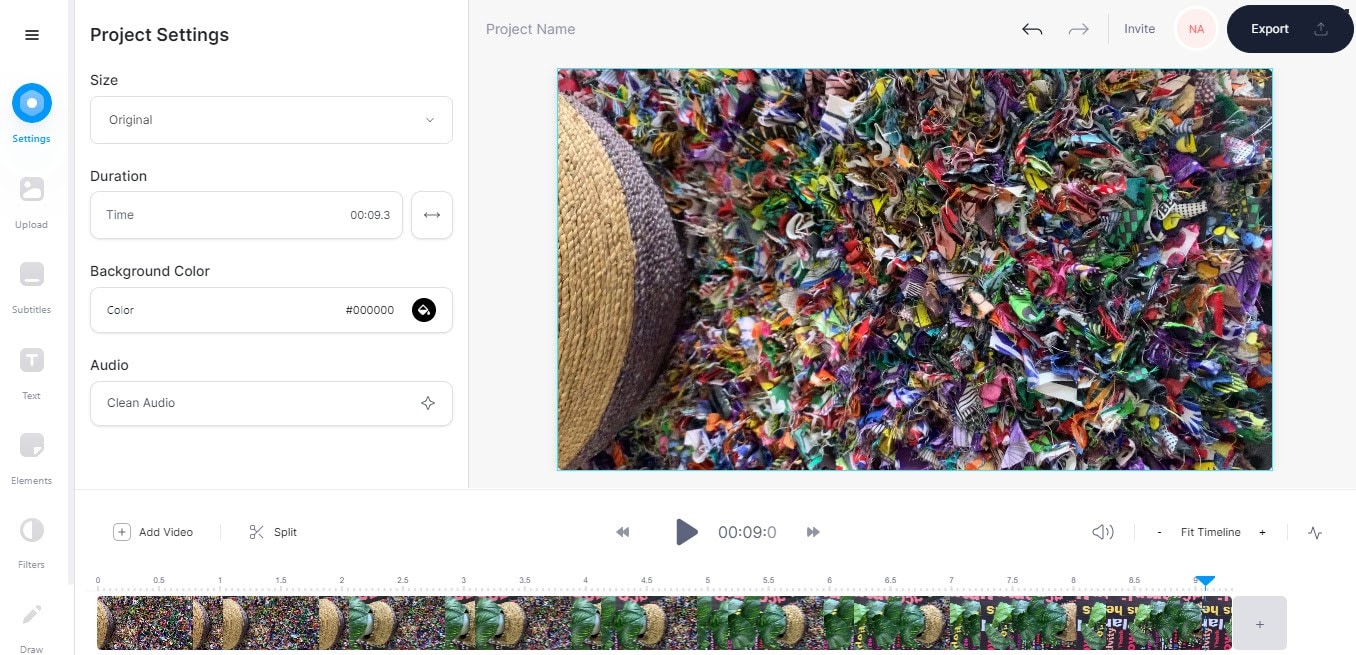
Step 2: Rotate the video:
Allow time for the upload to complete. The rotating button will display above the image when you click it. To change the direction of your movie, drag this button. Under the ‘Adjust’ menu, you may also write the exact rotation angle.

Step 3: Export the rotated video:
The rotating video will be saved when you click ‘Export,’ which you may publish to your Instagram feed.
You can download your video in a variety of resolutions, including Standard, HD, 4K, Super-8, and Cinematic.
Other video resolutions that you can export are Instagram, Twitter, and YouTube (4K, 1440P, 1080P, and 720P) video resolutions, which already contain the right settings — like file size and frames per second — for each site, so you don’t have to fiddle with the details.
3. Movavi Clips
Compatibility: Android
Almost every Android user who enjoys recording movies on their phones has been in this situation: you accidentally shot a video in portrait mode rather than landscape mode. Unfortunately, you didn’t realize it until it was too late. Your video may be a failure, but there is a simple solution.
Use Movavi Clips to adjust the orientation of your video. This useful program can assist you with various activities, like rotating and cropping your video, adding audio and narration, applying effects and stickers, and much more! Install Movavi Clips on your Android phone and follow the instructions below to learn how to rotate a video.
Step 1: Install Movavi Clips on your device
Install Movavi Clips on your Android device by going to Google Play and searching for it. After the installation is complete, open the program by tapping the Movavi Clips icon.
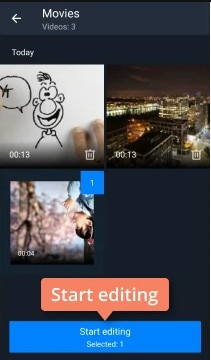
Step 2: Import Video
You’ll notice an active arrow pointing to the Plus icon as soon as you open the app. Choose a video by tapping this icon.

Then tap Start editing on the video you wish to fix.
 ZoneAlarm Extreme Security NextGen
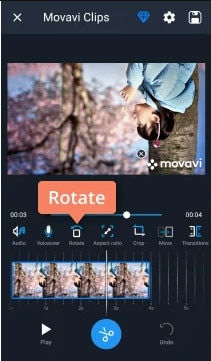
Step 3: Rotate the video
Tap the Rotate symbol on your Android device to rotate a video. It will counterclockwise rotate your movie by 90 degrees. Continue tapping the icon until you get the desired outcome.
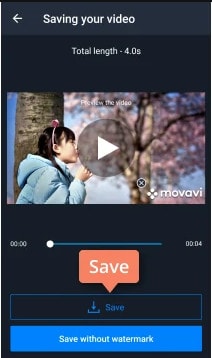
Step 4: Save the video
Tap the Save icon in the top right corner of the screen once you’ve completed editing.
Tap the Save button after previewing your video. It’s as simple as that! With Movavi Clips, rotating videos is a breeze.

4. VLC Media Player
Compatibility: Windows/Mac/iOS/Android
VLC Media Player is a completely free program. People usually think of VLC as a media player, but it’s a video editor if you dig further. It can also run on practically all systems, including Windows, Linux, Mac OS X, iOS, and Android as an open-source player. More crucially, it allows you to rotate and flip videos effortlessly. The instructions for rotating a video with VLC Media Player are listed below.
Step 1: Open the VLC media player and load the video you want to rotate.

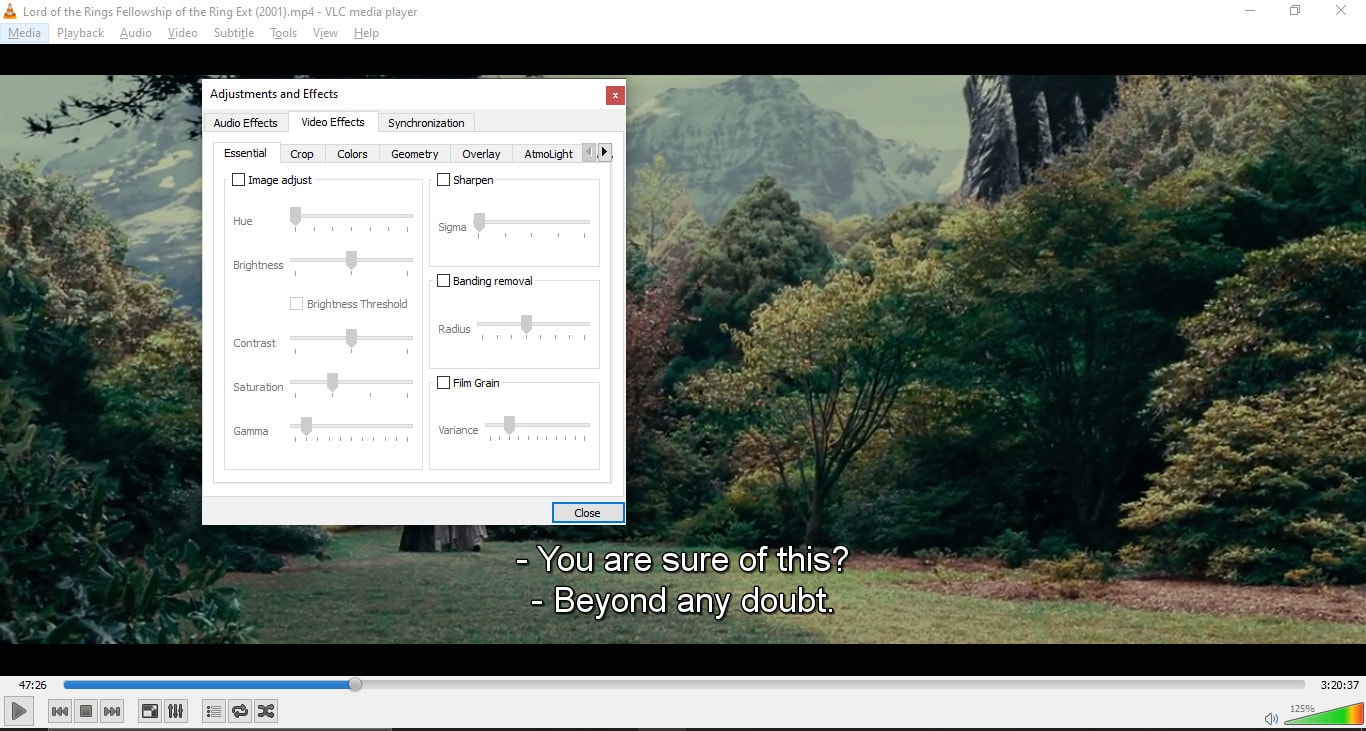
Step 2: Select Effects and Filters from the Tools menu. Then go to the Video Effects menu to rotate your videos.
Step 3: Select Geometry from the Video Effects subtab. To rotate in a specific direction, check the Transform box. You have the option to rotate 180, 90, or 270 degrees. In addition, you can rotate the movie at a specific angle.

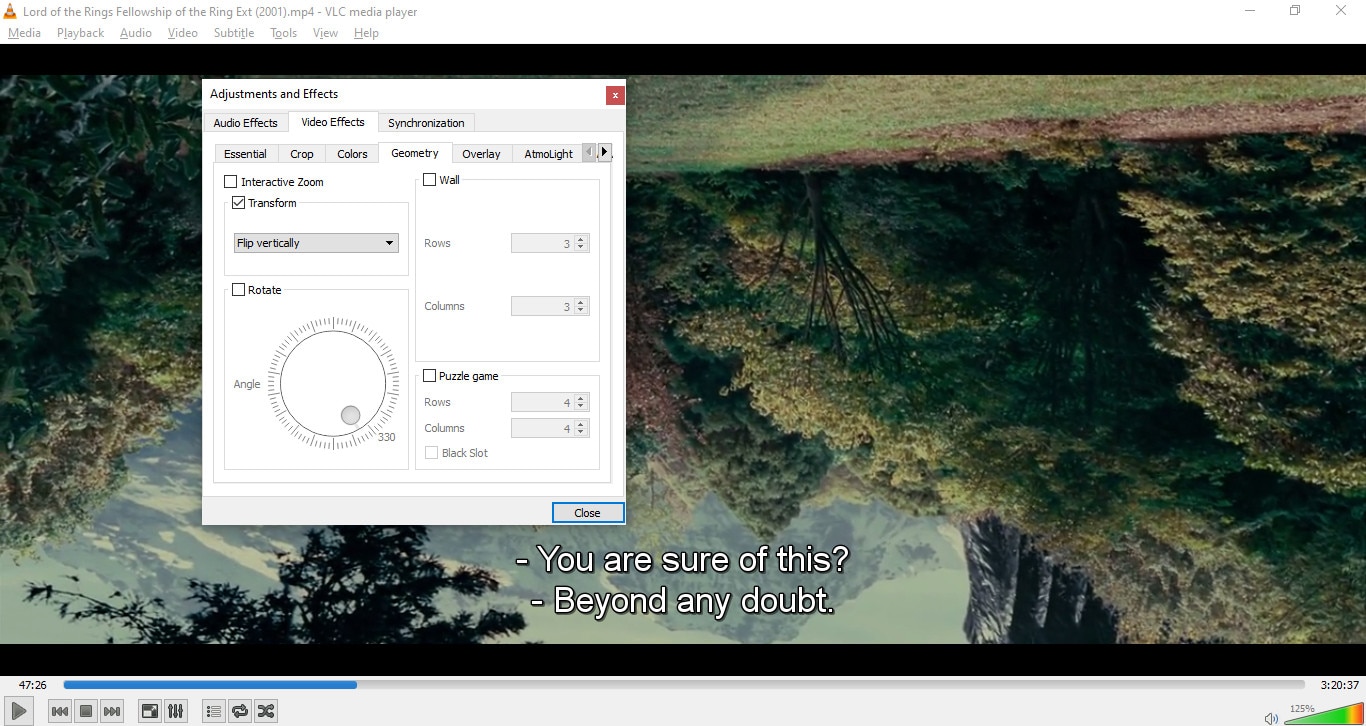
Note: These settings are retained when you start a new movie, so remember to uncheck the rotation.
Bottom Line:
You can easily rotate your videos according to the guidelines of the social media platforms such as Instagram. And you can solve many of your video editing difficulties in a single click with this program and improve the quality of your videos without watching a thousand YouTube videos to get it right.
Step 2: Rotate the video
Double-click the video clip on the timeline to open the video editing window. Under the “Transform” menu, look for the “Rotate” option. You can change the rotation value by sliding the slider or entering a certain value. It is possible to rotate up to 360o. For example, if you want to rotate this clip 90 degrees, write “90” in the box, and the video clip will be rotated.
By dragging the “Scale” button, you can make the image a full screen or alter the position, size, shape, and other aspects of the image directly in the Viewer panel.
Step 3: Export the video
When you’re happy, click export. You can alter the format of your work right here, or you can upload it to YouTube.
 Greeting Card Builder
2. Veed.io
Compatibility: Online
VEED is a web-based video editor that allows you to create and modify videos quickly. It’s free to use, and the instructions for rotating video clips are straightforward. In addition, you can use VEED to add subtitles, music, and GIFs, or merge and combine your videos online and rotate them.
Step 1: Import the video:
Click on ‘browse video’ to choose a video file from your computer to upload.
Whether or not you have a VEED account, you can upload and edit your video. You can also record a new video or use other upload mechanisms like Dropbox or a YouTube URL using VEED.
Step 2: Rotate the video:
Allow time for the upload to complete. The rotating button will display above the image when you click it. To change the direction of your movie, drag this button. Under the ‘Adjust’ menu, you may also write the exact rotation angle.
Step 3: Export the rotated video:
The rotating video will be saved when you click ‘Export,’ which you may publish to your Instagram feed.
You can download your video in a variety of resolutions, including Standard, HD, 4K, Super-8, and Cinematic.
Other video resolutions that you can export are Instagram, Twitter, and YouTube (4K, 1440P, 1080P, and 720P) video resolutions, which already contain the right settings — like file size and frames per second — for each site, so you don’t have to fiddle with the details.
3. Movavi Clips
Compatibility: Android
Almost every Android user who enjoys recording movies on their phones has been in this situation: you accidentally shot a video in portrait mode rather than landscape mode. Unfortunately, you didn’t realize it until it was too late. Your video may be a failure, but there is a simple solution.
Use Movavi Clips to adjust the orientation of your video. This useful program can assist you with various activities, like rotating and cropping your video, adding audio and narration, applying effects and stickers, and much more! Install Movavi Clips on your Android phone and follow the instructions below to learn how to rotate a video.
Step 1: Install Movavi Clips on your device
Install Movavi Clips on your Android device by going to Google Play and searching for it. After the installation is complete, open the program by tapping the Movavi Clips icon.
Step 2: Import Video
You’ll notice an active arrow pointing to the Plus icon as soon as you open the app. Choose a video by tapping this icon.
 vMix 4K - Software based live production. vMix 4K includes everything in vMix HD plus 4K support, PTZ control, External/Fullscreen output, 4 Virtual Outputs, 1 Replay, 4 vMix Call, and 2 Recorders.
Then tap Start editing on the video you wish to fix.
Step 3: Rotate the video
Tap the Rotate symbol on your Android device to rotate a video. It will counterclockwise rotate your movie by 90 degrees. Continue tapping the icon until you get the desired outcome.
Step 4: Save the video
Tap the Save icon in the top right corner of the screen once you’ve completed editing.
Tap the Save button after previewing your video. It’s as simple as that! With Movavi Clips, rotating videos is a breeze.
4. VLC Media Player
Compatibility: Windows/Mac/iOS/Android
VLC Media Player is a completely free program. People usually think of VLC as a media player, but it’s a video editor if you dig further. It can also run on practically all systems, including Windows, Linux, Mac OS X, iOS, and Android as an open-source player. More crucially, it allows you to rotate and flip videos effortlessly. The instructions for rotating a video with VLC Media Player are listed below.
Step 1: Open the VLC media player and load the video you want to rotate.
Step 2: Select Effects and Filters from the Tools menu. Then go to the Video Effects menu to rotate your videos.
Step 3: Select Geometry from the Video Effects subtab. To rotate in a specific direction, check the Transform box. You have the option to rotate 180, 90, or 270 degrees. In addition, you can rotate the movie at a specific angle.
Note: These settings are retained when you start a new movie, so remember to uncheck the rotation.
Bottom Line:
You can easily rotate your videos according to the guidelines of the social media platforms such as Instagram. And you can solve many of your video editing difficulties in a single click with this program and improve the quality of your videos without watching a thousand YouTube videos to get it right.
- Title: In 2024, Unexpected Vertical Tilt in Instagram Vids? Why?
- Author: Christopher
- Created at : 2024-08-22 04:04:18
- Updated at : 2024-08-23 04:04:18
- Link: https://some-approaches.techidaily.com/in-2024-unexpected-vertical-tilt-in-instagram-vids-why/
- License: This work is licensed under CC BY-NC-SA 4.0.